Laser cutting acrylic combines precision with material behavior. Cast acrylic vaporizes cleanly, leaving smooth, glossy edges, while extruded acrylic softens more and often requires slower speeds or multiple passes.
For example, a hobbyist using a CO₂ laser cutter can cut 1/4-inch cast acrylic in a single pass with clean edges, while extruded acrylic of the same thickness may require additional passes to prevent melting or rough edges.
Thicker panels (up to 10–12 mm) require higher-power CO₂ systems, which maintain consistent output across the work area. Material composition also matters—clear cast acrylic handles heat better than colored or extruded sheets, which absorb more energy and increase the risk of charring or warping.
Understanding the Types of Acrylic and Their Compatibility with Lasers
Acrylic comes in two main types:
Cast Acrylic
- Cleaner cuts with polished edges
- More heat-resistant
- Ideal for signage and display products
Extruded Acrylic
- Lower cost
- More prone to melting and warping
- Requires slower speeds and multiple passes
Thickness & Machine Matching
- 40–60W CO₂ laser → up to ~6 mm cast acrylic
- 80W+ CO₂ laser → up to ~10–12 mm (multiple passes recommended)
Preparing Your Acrylic and Workspace
Proper preparation ensures consistent results:
- Clean surface with isopropyl alcohol
- Keep protective film on during cutting
- Use a honeycomb bed for airflow
- Secure material to prevent warping
Additional setup:
- Use a sacrificial backing board (MDF)
- Ensure bed is level
- Maintain strong ventilation (≥200 CFM recommended)
Safety essentials:
- Respirator (organic vapor rated)
- Fire extinguisher (Class ABC)
- Never leave machine unattended
Optimizing Laser Cutter Settings for Acrylic
Correct settings depend on machine and material, but general rules apply:
Best Practices
- Use high power + moderate speed
- Maintain precise focus on the surface
- Use air assist to remove vaporized material
Workflow Tips
- Always run test cuts
- Adjust speed in small increments
- Monitor for:
- Bubbling → too much heat
- Rough edges → poor airflow
- Incomplete cuts → insufficient power
Finishing Techniques for Acrylic Edges
After cutting:
- Remove protective film carefully
- Clean edges with microfiber cloth
Polishing Methods
- Flame polishing → best for cast acrylic
- Sanding + polishing compound → for colored acrylic
Avoid overheating during finishing, as this can cause yellowing or stress cracks.
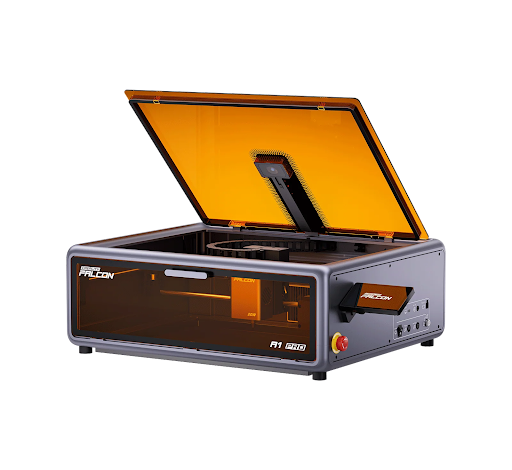
Creality Falcon Best-Fit Pick
The Creality Falcon A1 Pro is a diode-based laser engraver designed for beginners and mixed-material workflows.
It is best suited for:
- Wood engraving
- Leather cutting
- Thin dark acrylic
While it is not designed for cutting thick clear acrylic, it provides a safe and accessible entry point for users who work across multiple materials.
Troubleshooting Common Acrylic Cutting Problems
| Issue | Cause | Solution |
| Bubbling | Excess heat | Increase speed |
| Charring | Slow speed | Reduce power |
| Incomplete cut | Low power / poor focus | Increase passes |
| Cloudy edges | Extruded acrylic | Switch to cast |
Cost-Efficient Acrylic Cutting
Improve efficiency by:
- Using nesting layouts
- Minimizing spacing (1.5–2 mm)
- Reusing scrap materials
Maintenance tips:
- Clean lenses regularly
- Keep airflow system clear
- Batch jobs to reduce energy waste
Safety and Compliance (US Context)
Follow safety standards:
- OSHA / ANSI guidelines
- Enclosed operation for Class 4 lasers
- Proper exhaust system (200–400 CFM)
Best practices:
- Replace filters regularly
- Maintain clean workspace
- Log maintenance for compliance
Final Thoughts
Acrylic laser cutting delivers excellent results when using the right machine and setup.
- CO₂ lasers → best for cutting acrylic
- Diode lasers → limited to engraving and thin materials
For beginners, machines like the Creality Falcon A1 Pro provide a practical entry point, while more advanced users should consider CO₂ systems for high-quality acrylic cutting.